The past week has been tense. Our oldest daughter and family have all had a nasty intestinal flu bug that spread through their house like a wildfire! Granddaughter #1 came home from school sick and the rest was history. They quarantined themselves, I delivered pedialyte, Therm o Heat Pads, Tylenol, Ensure for adults, etc. to their front steps and didn't go near the house. Anything to keep fluids in everyone and keep them comfortable.
Our family was to gather today for our Christmas celebration. My husband woke up about 6 am with the flu. My efforts to make everything story book perfect until 1:30 this morning was for naught. We called the kids, told them to stay away and our granddaughters promptly began to cry. (The little darlings love to come to Grandpa & Grandma's...thank GOD!)
Our plan for today was to begin with brunch this morning, a mid afternoon ham dinner with gift opening in between. At 4 pm we all go to church together and then to my Dad's for a gathering of my side of the family. Traditionally we have cheese soup and some snacks, play a family bingo game and watch the little ones open more presents. Along with all the cooking I did yesterday to prepare for our family day, I had prepped for tonight's food plan. I had all the veggies chopped and the pork shoulder thawing in the fridge.
I decided this morning that the heat would kill any potential germs and I could wear gloves while cooking to cut down on cross contamination of flu germs. So I have put together the traditional cheese soup, loaded it into a crock pot and one of our girls will pick it up before church so the rest of the family can still enjoy this very special day.
My Christmas gift to everyone is my cheese soup recipe. It is rich, creamy and easy!
1 c. chopped onion
1 c. chopped carrot
½ c. chopped celery
2 to 3 potatoes (depends on their size) cut into small chunks (optional)
1 stick butter
½ c. flour
1 can chicken broth
½ t. salt
1 qt. ½ & ½ cream
16 oz Velveeta, cut in cubes
I begin by using all fresh veggies and only real butter. I sweat them in a large pan slowly until the veggies are translucent. Add the flour and blend completely. Allow to cook about one minute to take the raw taste off the flour. Basically, you are making a roux. Next you add the quart of half and half cream slowly while stirring constantly. Keep your heat low or you will have a scorched mess. When everything is blended and smooth, add the broth, salt and chunks of Velveeta. Heat through and serve with crumbled bacon.
Obviously, you can modify this recipe in many ways. Use a lighter milk product, double the recipe or thicken with a gluten free flour, which is what I did.
I used Jules All Purpose Gluten Free Flour in place of regular flour. No one will notice the difference and the soup may be enjoyed by daughter #1 who is gluten free.
This soup is yummy served in bread bowls for those able to eat wheat. We have a local fast food restaurant that will sell us a bread bowl for $1.00 each so that is usually what we use. The creamy soup soaks into the soft bread and creates this yummy comfort food. This certainly qualifies as a once every now and then treat because it isn't calorie conscious at all!
Merry Christmas!
Monday, December 24, 2012
Saturday, December 15, 2012
Kitchen Wisdom
When I got married in 1977, I didn't know how to boil water!
I know that sounds like a joke, but it is true. I was so bad at cooking, I'm not sure why my husband married me. I burned hard boiled eggs (can you say ditsy??) and the smell was worse than anything I had ever smelled. I tried to make steak under the broiler in the oven like my dad had taught me. That was a disaster, too. To the point that my husband went to work and complained to one of the guys. Well one of those guys made the mistake of repeating it to me...I didn't cook for a month. My husband and I learned two things from that experience...My husband learned to never again criticize me to his friends and I spent the month learning the basics of cooking.
I'm sure I must have cried to my mother because she came up with this wonderful book that I have used and almost destroyed throughout the years, but would never give away. The name of the book is KITCHEN WISDOM by Frieda Arkin.

Through the years I have added many items to my beloved book. If I saw a hint or a tip in Good Housekeeping magazine, I'd clip it and find the subject in my book and file it away.

Now that I have adult daughters of my own, I wanted them to have a manual for reference as well. Not that they need one...they are fabulous cooks and love to create in the kitchen. However, it feels like tradition for me to provide them with a book of their own "Kitchen Wisdom".
I found this book on a blog site I love! Cook Like Your Grandmother is a blog written by Drew Kime and he has a couple books for sale on his site. One of them is STARTING FROM SCRATCH. This book promises to explain what all the so called 'experts' believe we already know. This book is available as an ebook download or the old fashioned kind that we hold in our hands...my personal preference.
My kitchen wisdom didn't come naturally. I am grateful for those people who are able to organize their thoughts and put them to paper for the rest of us to enjoy!
Friday, December 7, 2012
You Gotta Have Goals
I've just returned from a great road trip to visit 2 quilt shops in the midwest. The first one was located in Fox River Grove, Illinois...a suburb of Chicago. The 2nd shop The Woolen Needle in Williamsburg, Iowa.
Both shops stimulated my imagination beyond description. I can see myself shifting from my love of creating quilts to creating with wool. My ultimate goal is to create a table rug made from wool pennies. I saw a picture in Country Living magazine and fell in love. I have had a picture on my inspiration board for quite some time and I've decided to get started. I hope I am done in 2013...you gotta have goals.
For those of you not familiar with wool pennies, they are cute little triple stacks of wool circles sewn together with a blanket stitch. The circles are then sewn to a piece of cloth...either black felt or black felted wool. I found the most basic and easy to understand description of a penny rug on Wikipedia:
In the 1800s, starting around the time of the Civil War, thrifty homemakers would use scraps of wool or felted wool from old clothing, blankets and hats to create designs for mats or rugs. Using coins as templates, they created circles and each piece was then stitched in blanket stitch fashion. (Thus, the name "penny" rug). Sometimes, the mats or rugs were backed with old burlap bags or feed sacks. Sometimes a penny was stitched inside the mat to make it lie flat.
Penny rugs are not actual rugs for the floor, but decorative coverings for beds, tables and dressers and mantles. Sometimes they are used as wall hangings or pillows. Most designs include circles and some include images from everyday life such as cats, flowers, birds and shapes such as stars and hearts.
Penny rugs are made by selecting good quality 100% wool. It must not be too thick. It may be hand-dyed or overdyed to give the piece dimension. Circles are cut from the wool in varying sizes and then stitched together concentrically using complementary colors. The circles are stitched to a wool backing in a pleasing design. When finished the entire piece should have a backing to cover the stitches and to protect it. The backing may be wool, linen or burlap.
I don't have any pictures to post of my own "pennies" as I haven't started yet. If you Google wool pennies or penny rugs, then click 'images', you will find hundreds of pictures.
This art is not for someone who hates hand work because it is almost entirely handwork. However, if you enjoy sitting in a comfy chair with a nice cup of hot tea and relaxing beyond description, you will love making wool pennies!
Thursday, November 29, 2012
Slim the Snowman
I have developed quite a love for felted wool in the past year. I love working with the wool, preparing it for applique and the patterns are so creative!
I found a great pattern in a book that I purchase through my local quilt store called "Primitive Quilts"...the Winter 2012 issue on page 42.

Sorry the picture isn't better...I'm not much of a photographer! Here is the image of the magazine so you will know what to look for in your local shop.

I don't miss a single issue. I honestly can't remember what I pay for it in my local store, but it is worth every penny! I make most of the patterns shown and at an average of $8.00 per pattern bought individually, it more than pays for itself.
I try to find as much of my own wool as possible. I only had to purchase 1/4 yard of the green background for "Slim". I shop my local thrift store for wool and felt it myself. I was able to use from my 'stash' for all the wool needed for "Slim". I sometimes feel as if I've hit the jackpot when I am able to find a great wool skirt or jacket for $1.50, bring it home, wash it in hot water with a little detergent, rinse in cold water and then dry in a hot dryer. A little pressing with a hot steam iron and I've got some beautiful pieces of wool!
There isn't much cooking going on here this week. I don't have anyone to cook for so I'm spending my time sewing and hooking. (I'm working on a star hooked rug) I have started a denim ragtime for my hubby's Christmas gift. More on that later.
Have a special weekend of relaxation and joy!
Monday, November 26, 2012
Food and Fatigue
We survived our "Christmas Vacation" party on Saturday night. All our guests came dressed as a character from the movie and most had a prepared line to share as they came in the door. It was a great evening.
I slept through church on Sunday morning. I woke at 10:45 am, got a glass of milk, checked email, Facebook & Pinterest...and promptly went back to sleep. I was in a fog of fatigue the entire day. My hubby was a little concerned about me, but I assured him I was fine; just needed a little recharge. I was right. I'm back to myself today. This afternoon I used up the leftover turkey and made turkey pot pies for the freezer. I'll share that recipe later in the week.
Today I want to share one of the soup recipes I made for Saturday night. I was fortunate to get my Wild Rice soup recipe from a friend who travels extensively and loves to cook.
If you aren't familiar with Wild Rice, please visit IWRA On-Line at http://www.wildrice.org/iwrawebsite/html/wildricehistory.html. We first learned about wild rice while on a fishing trip 20+ years ago in Canada. We prefer the wild harvested rice to the farm raised rice.
Everyone has a different method for cooking wild rice. Once you become familiar with it and it's nutty taste, you'll come up with your own methods and recipes. For the purpose of this recipe I will share my basic method of cooking wild rice.
I put 1/2 cup of rice into a medium saucepan. Cover generously with water. Bring to a boil and then simmer for about 20 minutes. Drain the rice and return it to the same pan. Cover with water once again and bring back to a boil. Turn your heat down and cook slowly until the rice splits and looks kind of squiggly. (I can't think of a better way to describe it!) Drain and set aside to use in the soup recipe.
Wild Rice Soup
1 stick butter
1 T. onion, chopped fine
1/2 cup flour
3 c. chicken broth
2 c. cooked wild rice (1/2 cup uncooked = 2 c. cooked)
1/3 cup minced ham
1/2 cup grated Swiss cheese
3-4 grated carrots
3 T. slivered almonds
1/2 teaspoon salt
1 c. half and half
2 T. dry sherry or dry red wine
Minced parsley or chives for garnish
Saute butter & onion. Blend in flour; gradually add broth. Cook, stirring constantly until mixture boils. Boil one minute. Stir in rice, ham, carrots, almonds & salt. Simmer 5 minutes. Blend in half and half, cheese & Sherry. Heat to serving temperature. Garnish with fresh parsley or chives.
This recipe is rich and creamy. An absolute comfort food. Serve it with some crusty bread and you have a perfect winter meal. Enjoy!
Friday, November 23, 2012
Christmas Vacation...the movie
My hubby is addicted to the Chevy Chase movie, 'Christmas Vacation'! He recites the lines 52 weeks of the year and as he watches the movie he will say the lines before the actor on screen can say them. Annoying? Yes, but...he doesn't hang out in bars, doesn't cheat on me and has great legs!
We are having a "Christmas Vacation Viewing Party" this weekend. Our party wouldn't be complete without the moose punch bowl for eggnog and the moose mugs. We've all had lessons on the proper way to hold the mugs when we drink.

Everyone is coming to the party dressed as their favorite character. I've decided to be Aunt Bethany. She's the one who always wears a hat and wraps her cat up in a box and brings it for a gift. I went to our local thrift store to find my outfit. I love thrift stores. More on that another day.
We are providing three different soups (guess who is making them?), a few easy snacks and beverages. This evening I made one of our favorite bar recipes I got from my sister about 25 years ago. They are called Peanut Butter Fingers and they are yummy! I hope you will try them.

Here's the recipe:
Peanut Butter Fingers
Cream:
1/2 cup margarine
1/2 cup sugar
1/2 cup brown sugar
Add:
1 egg
1/3 c. peanut butter
1/2 tsp. soda
1/2 tsp. vanilla
1/4 tsp. salt
Add:
1 cup flour
1 cup oatmeal
Bake in a greased 9 x 13 pan at 350° for 20 minutes. Remove from the oven and immediately spread with 6 ounces of semi-sweet chocolate chips.
Mix:
1/2 cup powdered sugar
1/4 cup peanut butter
2 – 4 tsp. milk
Drizzle over the chocolate chip layer.
I usually double the recipe and bake it in a jelly roll pan.
Tomorrow I plan to make a very simple chili, loaded baked potato soup and wild rice soup. More about that tomorrow.
Wednesday, November 21, 2012
Gluten Free
I am dead on my feet! I have been cooking and grocery shopping for two solid days.This is a good kind of exhaustion as I've been in my glorious element cooking.
Today I made two pumpkin pies, two pecan pies, one loaf of gluten free bread, 1 gluten free pie crust for another pumpkin pie, a sinful chocolate cake (new recipe), dressing and baked chicken legs which I used to make our gravy.
Daughter #1 began a gluten free diet about 6 months ago. Prior to that she had daily migraines and had been diagnosed with irritable bowel syndrome. Nothing the doctors gave her seemed to make her feel better so on a whim she decided to stop eating wheat. In a very short amount of time she was headache free and the irritable bowel syndrome disappeared. Her doctor sees no reason to test her for Celiac disease as she has already figured out that her body doesn't want wheat! There have been many challenges along the way. I made a batch of oatmeal buns yesterday and decided daughter #1 needed her own bread, too. I thickened the gravy with cornstarch and have plenty of veggies planned so she will have plenty to eat.
I spent quite a few hours last night searching for recipes and information. I landed on the King Arthur Flour website and was thrilled. They have tons of recipes, a great gluten free all-purpose flour as well as many grocery shelf products like the bread mix I made today. The flour is a bit pricey, but worth every penny.
I am also amazed at how much easier it is to find the ingredients needed for a gluten free diet. Bob's Red Mill has many options and I can usually find that along-side the King Arthur Flour choices.
I can't wait for tomorrow so I can taste the bread and the pie crust I made from the gluten free recipes!
Tuesday, November 20, 2012
Thanksgiving Prep
I am a compulsive organizer. Does this mean my house is always tidy and neat? No! However, when I have a job to do, I break it down into smaller tasks and order them so I can accomplish the most in the shortest amount of time.
Our house will host about 18 for Thanksgiving this year. This requires a fair amount of prep work so I'm not up for 24 hours straight the day of Thanksgiving. Part of my prep plan includes a detailed meal plan, which I translate to a huge grocery list. From my meal plan I decide what dishes I can make ahead and put into the fridge and another plan, with a timeline, for making sure the rest of the dishes are hot and on the table when our family and friends are ready to take their seats.
I always shop for groceries in at least 2 phases...sometimes 3. For this holiday, I broke my list down into 2 trips over 2 different days. The first trip was to gather everything that doesn't need to be frozen or refrigerated, except...cream cheese. We live in an average size community and it is not uncommon to show up at the grocery store on the Wednesday before Thanksgiving and find the cream cheese shelf empty. Also, I try to shop sales for about a month before the big day so I can catch the cream cheese, cans of pumpkin, evaporated milk, etc., at good sale prices. The shelf life for these items is way beyond one month so shopping early sales and squirreling them away is a good cost saving measure.
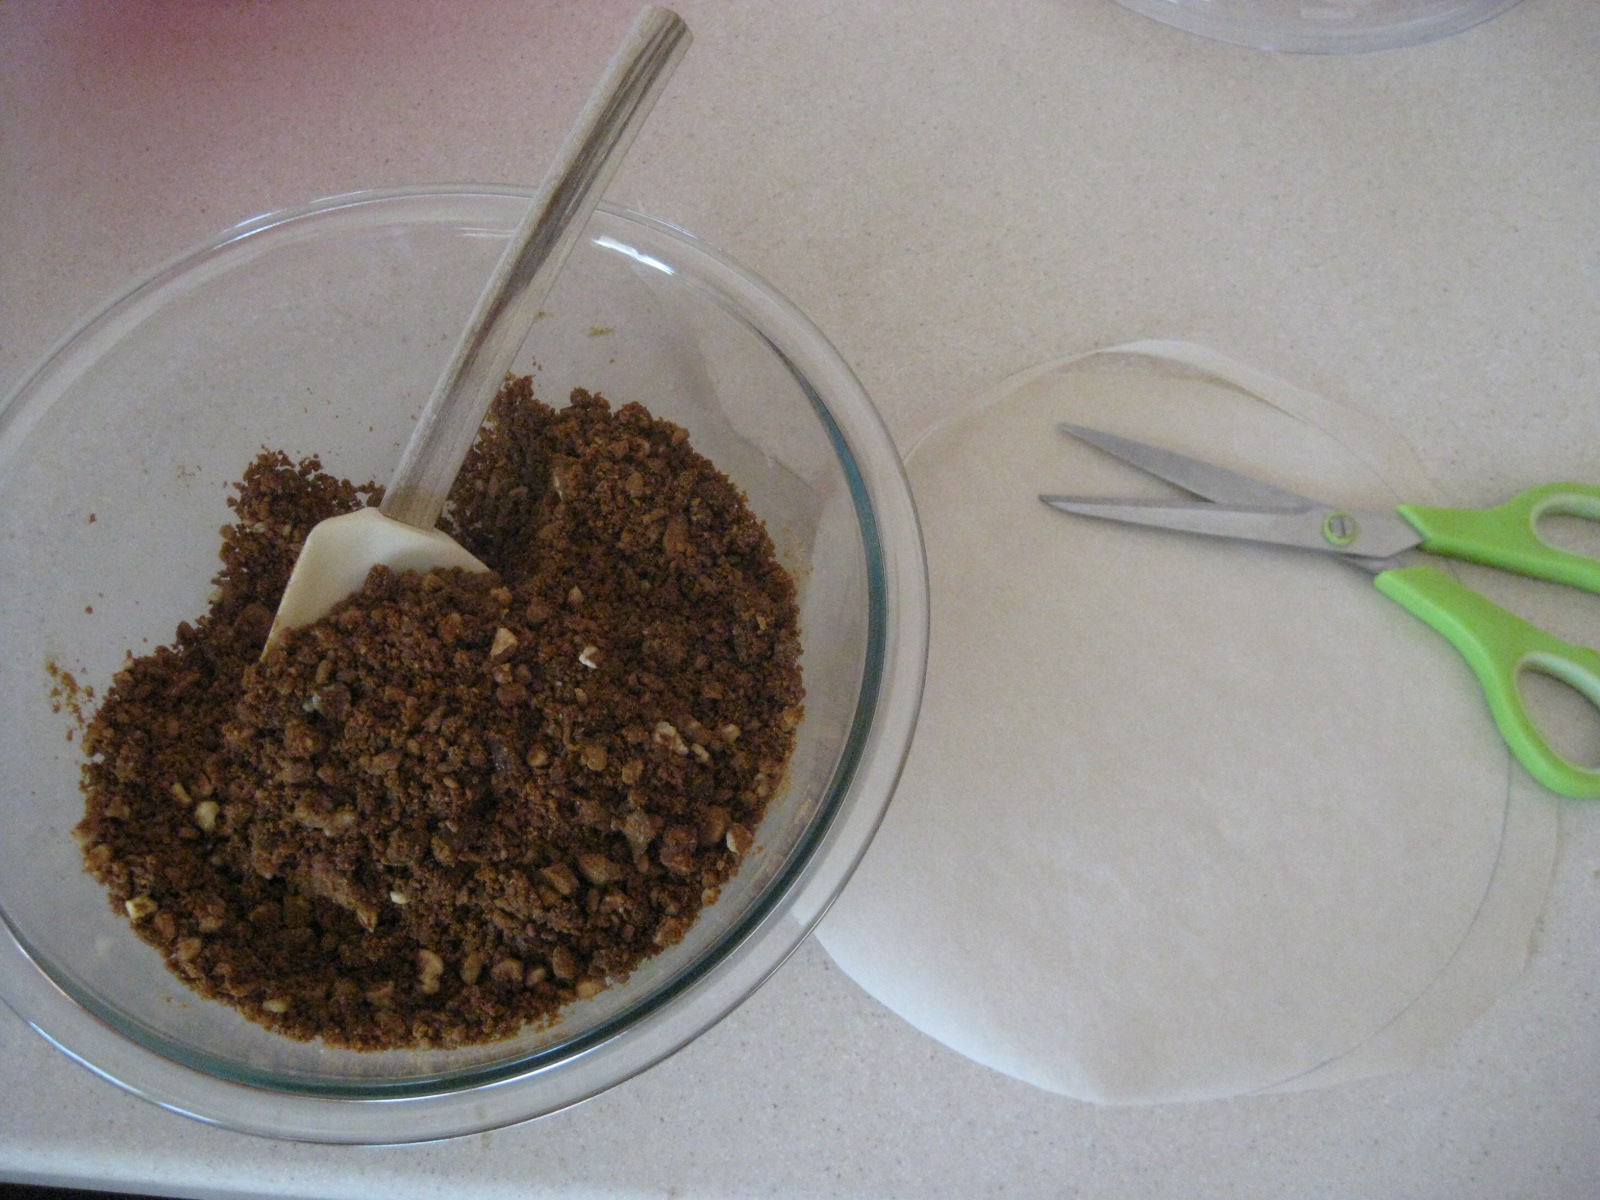
Monday I shopped with list #1. Today I woke early to bake...I made Spicy Pumpkin cheesecake & sweet potato casserole. I won't post the cheesecake recipe because you can get the recipe here: http://www.kraftrecipes.com/recipes/spiced-pumpkin-cheesecake-62444.aspx. I will share with you my method for baking cheesecake because I LOVE to make cheesecake! My hubby likes plain Jane cheesecake with no topping, nothing fancy. I, however, want to make every kind of cheesecake recipe I see on the net.
The method you use to make your cheesecake is very important. Set your ingredients out on the counter for about one hour to reach room temperature...including the eggs. When the cream cheese is soft, beat well and add the sugar specified. I next add 1 can of pumpkin puree, spices, vanilla and the eggs last. When incorporating the eggs, add them one at a time and only beat on low speed until they are incorporated. Pour this mixture into your already prepared crust that has been packed down with a water glass to make it smooth and evenly distributed. Bake at 350 degrees for 1 hour and 20 minutes. Remove from the oven, run a knife around the outside rim but do not loosen the ring on your springform pan. Allow to cool at room temperature and then cover and store in the refrigerator for 24 hours. Not every one will agree with me here...I believe the flavors of your cheesecake meld when allowed to sit for 24 hours before serving.
A note about the crust...I cut a piece of parchment paper large enough to trace the base of the springform pan. I cut inside the lines drawn. I spray the springform pan with PAM, place the parchment round into the bottom and spray it again. This will allow you to remove the cheesecake from the pan when ready to serve. After 24 hours of chilling, I remove the rim, place my hand onto the top of the cheesecake and turn the cake upside down. You will be able to remove the bottom of the pan and the parchment. Place your serving plate on the bottom of the cake and turn it back over. Your cheesecake will hold up beautifully and you'll be so happy you aren't cutting through to your springform pan.

The sweet potato casserole is killer...if I do say so myself! I begin with what my market calls Yams, but I honestly think they are plain old sweet potatoes. I put them into a fairly large pan and add water to about 1/2 way up the pan. I do not peel my potatoes first. When they are fork tender, I dump them into a strainer. Using a pot holder, I hold each potato in my left hand and with a Pampered Chef spatula, I lightly make a slit in the top of the potato. I then lay back the peeling, cut sections of the potato and turn it into my bowl.

Once inside the bowl I add the brown sugar, eggs, milk (I use half and half) and the eggs. I use a Kitchen Aide hand beater to blend the ingredients. Put this mixture into a 2 quart baking dish and top with the brown sugar/pecan/butter mixture. This can be made a day or two ahead. Remove from the fridge about an hour before time to put it into the oven and then bake accordingly. This is not low fat. This is not low sugar. This recipe is not for the faint of heart. Isn't Thanksgiving supposed to be about 'treats'? Well, this is a treat...and I don't even like sweet potatoes!
Sweet Potato Casserole
A sweet potato casserole recipe, made with mashed sweet potatoes and a crunchy pecan topping.
• 3 cups mashed sweet potatoes
• 1 cup brown sugar
• 2 eggs, lightly beaten
• 1 teaspoon vanilla
• 1/2 cup milk
• 1/2 cup melted butter
• .
• Topping:
• 1/2 cup brown sugar
• 1/3 cup flour
• 1/3 cup melted butter
• 1 cup chopped pecans
Combine first 6 ingredients. Pour into a buttered 1 1/2 to 2-quart casserole dish. Mix remaining ingredients together and sprinkle over top. Bake at 350° for 30 to 40 minutes, until hot and browned.
Serves 6 to 8.
I love the homeyness of preparing the Thanksgiving meal. It is definitely a labor of love. Tomorrow I make pumpkin and pecan pies.
I'm organized and ready to give thanks.
Our house will host about 18 for Thanksgiving this year. This requires a fair amount of prep work so I'm not up for 24 hours straight the day of Thanksgiving. Part of my prep plan includes a detailed meal plan, which I translate to a huge grocery list. From my meal plan I decide what dishes I can make ahead and put into the fridge and another plan, with a timeline, for making sure the rest of the dishes are hot and on the table when our family and friends are ready to take their seats.
I always shop for groceries in at least 2 phases...sometimes 3. For this holiday, I broke my list down into 2 trips over 2 different days. The first trip was to gather everything that doesn't need to be frozen or refrigerated, except...cream cheese. We live in an average size community and it is not uncommon to show up at the grocery store on the Wednesday before Thanksgiving and find the cream cheese shelf empty. Also, I try to shop sales for about a month before the big day so I can catch the cream cheese, cans of pumpkin, evaporated milk, etc., at good sale prices. The shelf life for these items is way beyond one month so shopping early sales and squirreling them away is a good cost saving measure.
Monday I shopped with list #1. Today I woke early to bake...I made Spicy Pumpkin cheesecake & sweet potato casserole. I won't post the cheesecake recipe because you can get the recipe here: http://www.kraftrecipes.com/recipes/spiced-pumpkin-cheesecake-62444.aspx. I will share with you my method for baking cheesecake because I LOVE to make cheesecake! My hubby likes plain Jane cheesecake with no topping, nothing fancy. I, however, want to make every kind of cheesecake recipe I see on the net.
The method you use to make your cheesecake is very important. Set your ingredients out on the counter for about one hour to reach room temperature...including the eggs. When the cream cheese is soft, beat well and add the sugar specified. I next add 1 can of pumpkin puree, spices, vanilla and the eggs last. When incorporating the eggs, add them one at a time and only beat on low speed until they are incorporated. Pour this mixture into your already prepared crust that has been packed down with a water glass to make it smooth and evenly distributed. Bake at 350 degrees for 1 hour and 20 minutes. Remove from the oven, run a knife around the outside rim but do not loosen the ring on your springform pan. Allow to cool at room temperature and then cover and store in the refrigerator for 24 hours. Not every one will agree with me here...I believe the flavors of your cheesecake meld when allowed to sit for 24 hours before serving.
A note about the crust...I cut a piece of parchment paper large enough to trace the base of the springform pan. I cut inside the lines drawn. I spray the springform pan with PAM, place the parchment round into the bottom and spray it again. This will allow you to remove the cheesecake from the pan when ready to serve. After 24 hours of chilling, I remove the rim, place my hand onto the top of the cheesecake and turn the cake upside down. You will be able to remove the bottom of the pan and the parchment. Place your serving plate on the bottom of the cake and turn it back over. Your cheesecake will hold up beautifully and you'll be so happy you aren't cutting through to your springform pan.
The sweet potato casserole is killer...if I do say so myself! I begin with what my market calls Yams, but I honestly think they are plain old sweet potatoes. I put them into a fairly large pan and add water to about 1/2 way up the pan. I do not peel my potatoes first. When they are fork tender, I dump them into a strainer. Using a pot holder, I hold each potato in my left hand and with a Pampered Chef spatula, I lightly make a slit in the top of the potato. I then lay back the peeling, cut sections of the potato and turn it into my bowl.

Once inside the bowl I add the brown sugar, eggs, milk (I use half and half) and the eggs. I use a Kitchen Aide hand beater to blend the ingredients. Put this mixture into a 2 quart baking dish and top with the brown sugar/pecan/butter mixture. This can be made a day or two ahead. Remove from the fridge about an hour before time to put it into the oven and then bake accordingly. This is not low fat. This is not low sugar. This recipe is not for the faint of heart. Isn't Thanksgiving supposed to be about 'treats'? Well, this is a treat...and I don't even like sweet potatoes!
Sweet Potato Casserole
A sweet potato casserole recipe, made with mashed sweet potatoes and a crunchy pecan topping.
• 3 cups mashed sweet potatoes
• 1 cup brown sugar
• 2 eggs, lightly beaten
• 1 teaspoon vanilla
• 1/2 cup milk
• 1/2 cup melted butter
• .
• Topping:
• 1/2 cup brown sugar
• 1/3 cup flour
• 1/3 cup melted butter
• 1 cup chopped pecans
Combine first 6 ingredients. Pour into a buttered 1 1/2 to 2-quart casserole dish. Mix remaining ingredients together and sprinkle over top. Bake at 350° for 30 to 40 minutes, until hot and browned.
Serves 6 to 8.
I love the homeyness of preparing the Thanksgiving meal. It is definitely a labor of love. Tomorrow I make pumpkin and pecan pies.
I'm organized and ready to give thanks.
Monday, November 19, 2012
Introducing...
Abbie!
As this is my first post, I have a feeling I'm writing to myself. Well, that's OK, I'm a good listener.
I'd like anyone who reads my blog to know a little bit about me. I consider myself luckier than anyone deserves. I am married to a wonderful guy (Stan) and we have 2 adult daughters. Each of our daughters had the good sense to marry great guys who work hard and love them deeply. Daughter and husband #1 have 2 daughters, which makes me one very happy Grandma! Daughter #2 was recently married...grandchildren are still a wish and a prayer away.
I live in a small community which provides a good quality of life. My husband supported me as a stay-at-home mom. I have considered that my career. I know, my profile says consulting, but who among the mothers out there are not consultants? I could have listed chef, housekeeper, waitress...you get the picture. I am a jack of many trades and have spent 30+ years honing my "work at home" skills. I am proud of the home I've made for my family, the children we have raised and the (mostly) quiet life we live.
I have jokingly said that when Stan and I got married I couldn't boil water. Well, that was almost the truth. My mom was a fabulous cook during my childhood. Often cooking with few resources and finding a way to make a meal out of meager pickings in the cupboard. As the years have progressed, I've taught myself to make pie (yes, home made pie crust!) baked goods and according to my family, pretty good meals. My mom's forced frugality has served me well. An example...I do not throw away those last few bits of veggies away. You know, a tablespoon or two that no one ate from the pan or serving bowl? Mom always kept a container in our freezer, in which she put those little bits of veggies. When the container was full, Mom made vegetable soup!
I was introduced to sewing at a very early age. I wouldn't call myself a seamstress, but if forced, I could sew together a simple garment. Sometime in the 90's I discover quilting. I love everything to do with creating quilts...the feel of the fabric, the sound of the sewing machine humming away and the satisfaction of a completed project. I try a new concept each time I make a quilt so that I am always learning. The current craze for wool has caught my attention. I don't think it would be an exaggeration to say I am hooked on wool. I scour second hand stores, the Salvation Army and Goodwill for wool. Felted or Fulled wool can cost up to $58 a yard when purchased retail. I am forced to buy some retail pieces, but mostly I bring home skirts, jackets...anything I can find and I felt it myself. There are endless things yet to be learned about this craft.
I take time every night before bed to read a book or magazine, exercise every day except Sunday and spend as much time as possible with my family and friends.
My blog goals...
Primarily,I hope to share my love of food, the things I've learned in the kitchen and share some of my favorite recipes. Along the way I'm sure I'll throw in a project unrelated to food, but mostly I hope we can share about food.
Be patient with me...
I am new to this. Uploading pictures may be tedious for me at first. My posts may be somewhat sporadic. What I consider important is that I share openly with you and hopefully, I'll learn from your comments.
So make yourself a cup of hot tea, find a comfortable chair and...be Epi-curious with me!
Subscribe to:
Comments (Atom)